Finding and Adjusting the ARMS Activation and Settings on Your Cutter
This article will help owners of the FC8000 or Q-Series vinyl cutters (Q24, 30, 42, 54, and 64) with their ARMS activation and settings on their equipment.
- Press the key.
- MENU screen is displayed.
- Press the key (ARMS).
- ARMS setting screen (1/4) is displayed.
- Press the key (MARK SCAN MODE).
- MARK SCAN MODE screen is displayed.
- Press the key (MARK SCAN MODE).
- MARK SCAN MODE setting screen is displayed.
- Press the key (ARMS).
- MARK SCAN MODE is selected and it will return to MARK SCAN MODE setting screen.
- It will return to MARK SCAN MODE setting screen without changing the settings when you press the POSITION (◄) key (PREVIOUS).
- Press the key (POINTS).
- NUMBER OF POINTS setting screen is displayed.
- Press the key (4POINT).
- POINTS is selected and it will return to MARK SCAN MODE setting screen.
- It will return to MARK SCAN MODE setting screen without changing the settings when you press the POSITION (◄) key (PREVIOUS).
- Confirm the setting and press the key (SET).
- Setting will be set, and it will return to ARMS setting screen (1/4).
- It will return to ARMS setting screen (1/4) without changing the settings when you press the POSITION (◄) key (CANCEL).
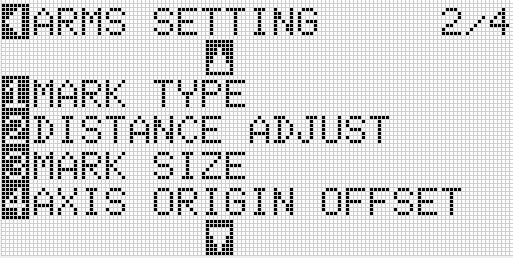
- Advance to next page (2/4) by pressing the Down Arrow.
- Press the key .
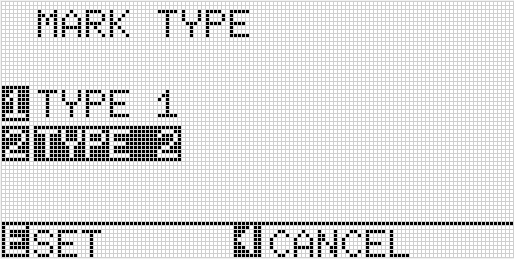
- Select Type 1 or Type 2 depending on what marks you're printing.
- Press to set.
- Press the key.
- It will return to default screen.